How do I access, download, and refresh key research reports?
Review the following instructions for accessing and downloading reports, refreshing the data as needed, and sharing with others. Please reach out to orishelp@uw.edu if you have any questions or require assistance.
Currently, the following reports are available for campus usage:
- Awards, Proposals, and Related Requests Workbook (MRAM presentation)
- Unassigned Subaward Requests (Email guidance)
- Award and Modification Workbook (RAB presentation)
- Research Security Training Lookup
How to Access the Reports
Prerequisites
Please ensure you meet the following prerequisites before accessing a report:
- You are using a Windows PC with Microsoft Excel installed.
- The following screenshots are from Excel Office365 Version 2409. While this process may work for Mac users as well, it has not been tested on Mac versions.
- Important: You must be signed in to your PC using your NETID\username credentials.
- If you are unsure if you are signed into your computer using your NetID, please contact your IT help desk.
- Your PC’s network connection is one of the following:
- A wired (ethernet) cable connection to the UW or School of Medicine network and not connected to a VPN.
- A connection to UW or School of Medicine Wi-Fi and connected to Husky OnNet VPN (Server: All Internet Traffic).
- A remote (off campus) internet connection and connected to Husky OnNet VPN (Server: All Internet Traffic).
Finding and Downloading the Report
- Navigate to Key Reports and sign in with your NetID account credentials.
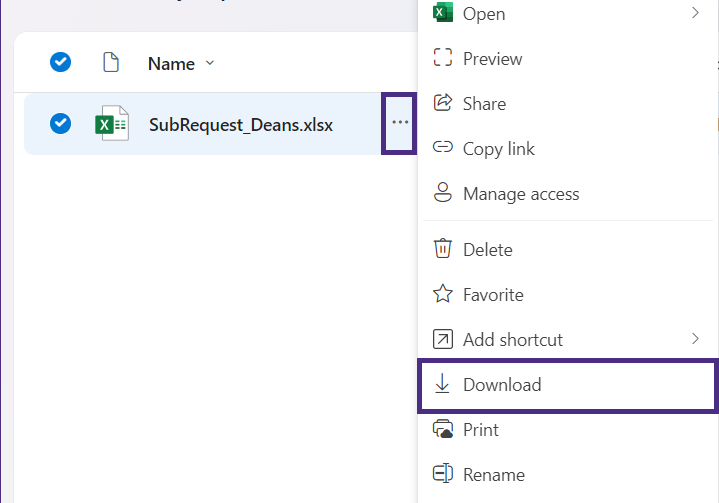
- Select the ellipsis (…) next to your report of choice and choose Download.
Opening and Refreshing the Report
Note: When Excel opens, you may see yellow Read-Only and Security Warning warning bars. Select the Edit Workbook and Enable Content buttons to enable editing. When selecting the Edit Workbook button, you may receive the File In Use dialog box. Choose to Save and edit a copy of the file.
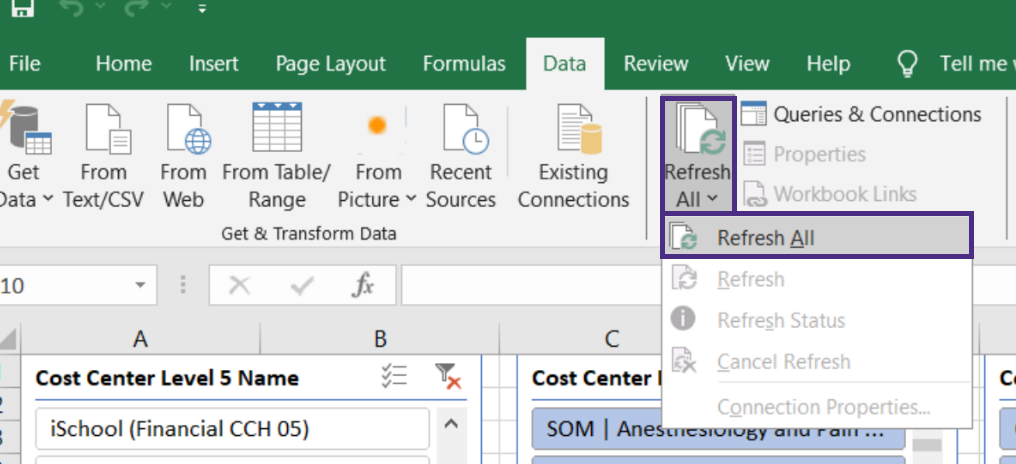
- Initiate a data refresh by navigating to the Data tab and selecting Refresh All > Refresh All.
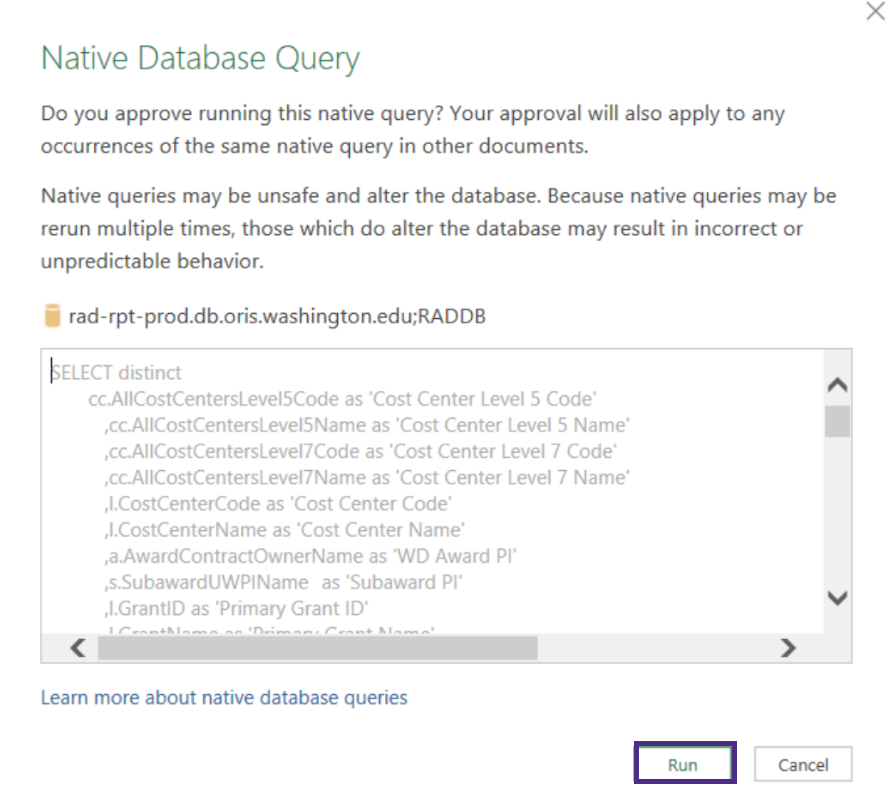
- Run the native database query.
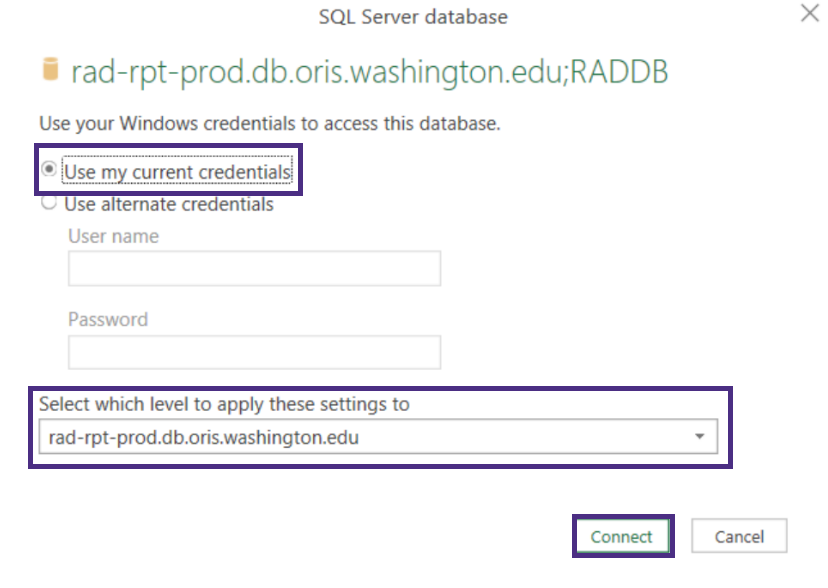
- Select Use my current credentials and Connect. We have not had success when selecting the Use alternate credentials option with NetID credentials. Ensure you are signed in to Windows with your NetID account credentials.
- The data should refresh. The refresh is typically very quick. If you do not see any errors, then you may assume the data has been refreshed.
- Save the file locally. Select File and choose Save As to save it on your computer.
- You are now free to make and save any changes you see fit. You should be able to open the file at any time, and provided you are connected as specified in the Prerequisites, you should be able to refresh the report to get the latest data. You also should not need to go through all of the steps outlined above with subsequent refreshes.
Sharing Your Version of the Report
If you would like to make changes and share these with others, follow the steps outlined. You will need access to your UW OneDrive account.
How to Share
- Ensure you have saved a local copy of the report to your computer with all the changes you want to share.
- Open File Explorer on your computer.
- Navigate to the folder that contains your local copy of the report.
- Copy the file using CTRL + C.
- Navigate to the folder OneDrive – UW.
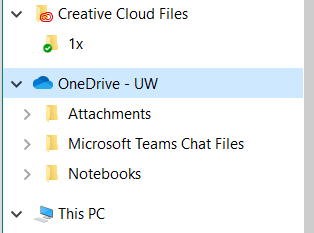
- Create a new folder in OneDrive – UW. We recommend naming it Shared Reports.
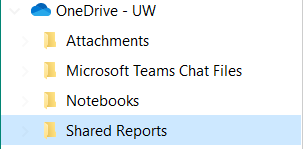
- Select the Shared Reports folder and use CTRL + V to paste the report file.
- Open the copied report file in the Shared Reports folder.
- In the upper right corner of the Excel window, select the Share button and choose Share….
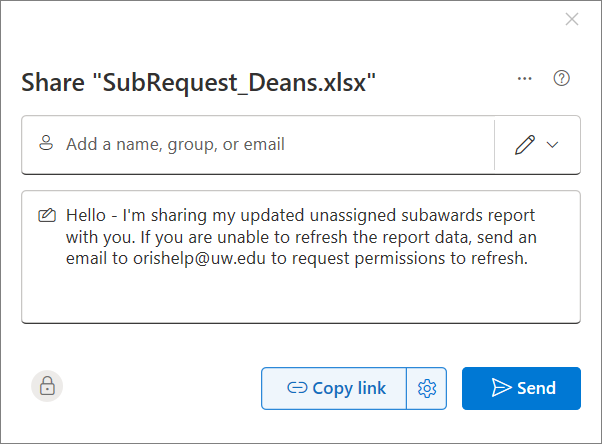
- Start typing the name or NetID of a person you want to share with, and choose the correct person from the options provided. You can choose more than one person at a time.
- Add a message for the recipient and select the Send button.
Need Help?
If you encounter any issues accessing this report or refreshing the data, please reach out to orishelp@uw.edu for assistance.