Lesson 3: Site Management Features
Overview
Few web pages exist in isolation. Most are part of larger websites, with complex webs of links between pages. Large organizations typically have web design teams - groups of designers, coders, and managers working on various components of a site simultaneously. Managing the design and maintenance of large websites can be organizationally challenging. However, web authoring software provides a variety of features that assist in this process. This lesson provides an overview of some of those features.
Learner Outcomes
At the completion of this exercise, you will be able to:
- describe the benefits of using web authoring software for managing websites.
- identify features within your web authoring software that facilitate site management.
What can you do with site management features?
The following is a list of some of the common site management features available in web authoring software. Some software comes bundled with these features. Other software requires the installation of plug-ins or extensions, many of which are available for free from the vendor website. These features distinguish the commercial software products from the free ones. Free web authoring software tends to provide tools for creating and editing web pages, but few if any of these tools provide many, if any, features for managing websites. The following list includes a few of the types of functions you might find in a commercial web authoring software product.
- Check your entire website for broken links.
- Automatically update internal site links if a filename is changed.
- Check your entire website for spelling errors.
- Check your entire site for missing alt text and other accessibility problems.
- Check your entire site for common HTML errors.
- Check your entire site for compatibility across multiple browsers.
- Check your entire site for slow pages.
- Check your entire site for problems that might affect search engine optimization (SEO).
- Lock files to prevent two team members from modifying a file simultaneously.
- Manage workflow: See which team members worked on which files on which dates.
Activities
- Your instructor will lead you through a discussion of website management, including how web design teams utilize web authoring software to manage their websites.
- Following discussion, explore your web authoring software, and try to identify which of the above features your software seems to support. Be prepared to discuss what you've found with your instructor and the rest of the class.
- Set up a website using your school's web authoring software. Use your portfolio website as the site content, so all you have to do is define this as your site within your web authoring software. See below for instructions on Setting up a Site using two of the most popular web authoring software programs.
- Once you have setup your website, test three or more of the website management features from the above list on your own websites. Choose features that generate reports, and share those reports with your instructor. If the reports show problems (e.g., bad links, missing alt text, etc.) correct the problems and re-run the report (and again, share it with your instructor) so you can show evidence that the problems have been corrected.
Setting up a Site
In order to use the site management features within web authoring software, you must first create a site. You could create a new site, but if you already have a site (such as the web portfolio you've created in this class) you simply need to setup that site within your web authoring software, so the software recognizes it as a site. Once you have completed this step, you will be able to use your software's various site management functions. Below are instructions for a few popular web authoring software programs. If you're using a different program, the procedure might be similar to these.
Adobe Dreamweaver
The following steps work for most versions of Dreamweaver, and have been tested from Dreamweaver MX 2004 through Dreamweaver CS5.5:
- From the main menu, select Site > Manage Sites.
- Select the New... button, then select Site.
- This launches the Site Definition wizard, which walks you through the process of setting up your site.
- Now that your site has been defined within Dreamweaver, you can use a variety of Dreamweaver's site functions, most of which are available within the Site menu.
Microsoft Expression Web
To set up a website using Microsoft Expression Web 4, follow these steps:
- From the main menu, select Site > Open Site .
- In the Open Site dialog, browse to the folder where your website is stored, then click Open.
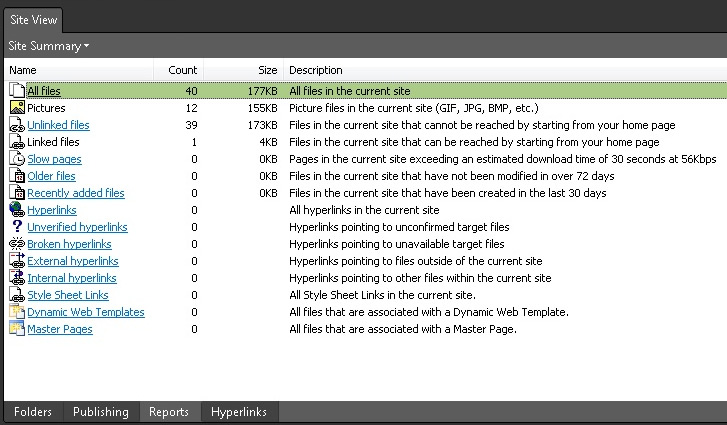
- Expression will display all files and folders in the current directory. Site management functions can be accessed by clicking on the Reports tab (located by default at the bottom of the window) or the Tools menu. See below for a screen shot.

All done?
Share your printed reports with your instructor. Then move on to Module 2.